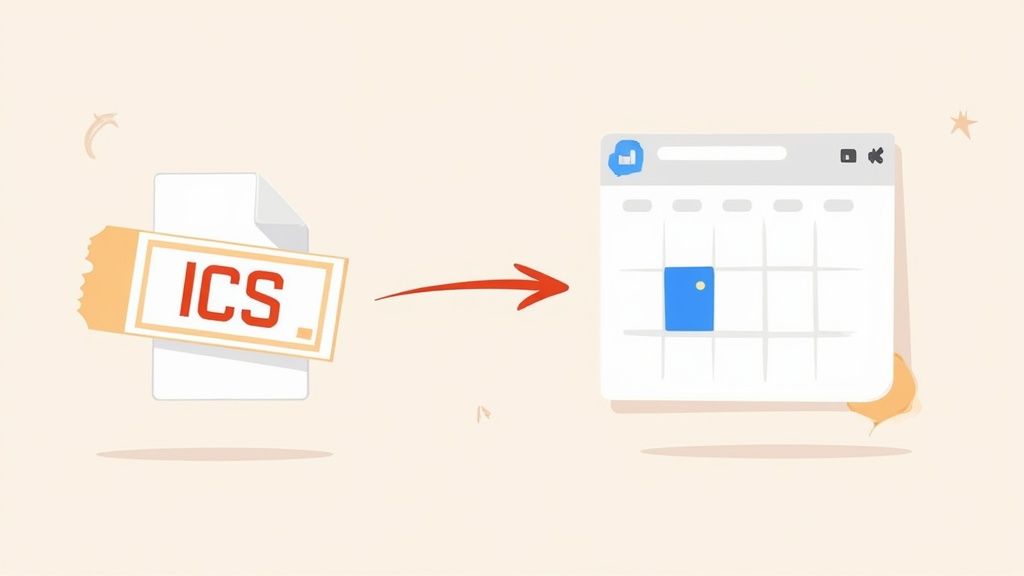
An ICS file is a universal calendar format that works like a charm with Google Calendar. The easiest way to think of it is as a digital ticket for an event. It’s a simple text file packed with all the key details - date, time, location - that any calendar app can instantly understand and import.
What an ICS File Is and Why It Matters
Ever get an email for a webinar or a dentist appointment and, instead of manually typing everything into your calendar, you just click a link and poof - the event appears, perfectly scheduled? That little bit of magic is powered by an ICS file.
This simple file is the unsung hero of modern digital scheduling. It acts as a universal translator between calendar platforms. So, if your colleague uses Apple Calendar and you’re on Google Calendar, an ICS file ensures you both see the exact same event information. No friction, no compatibility headaches.
The Universal Language of Calendars
The format, officially known as iCalendar, has been around since 1998. In that time, it has become the undisputed standard for swapping calendar data. Today, an estimated 98% of calendar applications around the globe support ICS files, including big players like Google Calendar, Microsoft Outlook, and Apple Calendar. This massive adoption rate is exactly why the ics file for google calendar integration is so reliable.
Behind the scenes, the file is just a plain text document. This makes it incredibly lightweight and a breeze to share through email, on a website, or even in a quick message.
At its core, an ICS file is a promise of consistency. It guarantees that the event you share is the exact event someone else receives, bridging the gap between different digital ecosystems and preventing miscommunication.
What Information Does an ICS File Contain?
An ICS file neatly bundles all the critical parts of an event into a structured format. If you were to crack one open, it might look a little technical, but the contents are actually quite straightforward. For anyone wanting to share events effectively, getting a handle on these components is key. If you're looking to get into the weeds, our guide on how to create an ICS file is a great place to start.
Here's a quick rundown of what you'll typically find inside:
- Event Title (SUMMARY): The name of the event, like "Quarterly Business Review" or "Dr. Smith Appointment."
- Start and End Time (DTSTART/DTEND): The precise start and end of the event, date and time included.
- Location (LOCATION): This could be a physical address ("123 Main St, Anytown") or a link to a virtual meeting.
- Description (DESCRIPTION): The spot for extra context, like an agenda, prep notes, or contact info.
To make this even clearer, here’s a table breaking down the essential data fields.
Key Information Inside an ICS File
This table summarizes the core data points you'll find in a standard ICS file, giving you a better sense of the information being shared.
| Data Field | What It Means | Example |
|---|---|---|
| SUMMARY | The official title of the event. | "Project Phoenix Kickoff" |
| DTSTART | The exact date and time the event begins. | 20241026T100000Z |
| DTEND | The exact date and time the event ends. | 20241026T110000Z |
| LOCATION | Where the event is happening. | "Conference Room 4B" or a Zoom link |
| DESCRIPTION | Additional details, notes, or agenda. | "Agenda: Intros, project goals, Q&A." |
Understanding these basic components is the first step to mastering how to share events seamlessly, no matter what calendar your audience uses.
A Look Inside an ICS File
Diving into the technical guts of a file might sound a bit intimidating, but an ICS file is surprisingly simple. Think of it less like scary, complex code and more like a recipe card for an event. Every line is just a clear instruction telling your calendar what to do.
At its core, an ICS file is just a plain text document. Seriously. You could pop one open in any basic text editor and read everything inside. No special software needed to see the raw data that builds your calendar event.
This simplicity is its greatest strength. It’s what guarantees that different calendar apps, from Google Calendar to Outlook, can all read and understand the event details without any hiccups or translation problems.
This infographic breaks down the main parts of an ICS file into its key chunks of information.
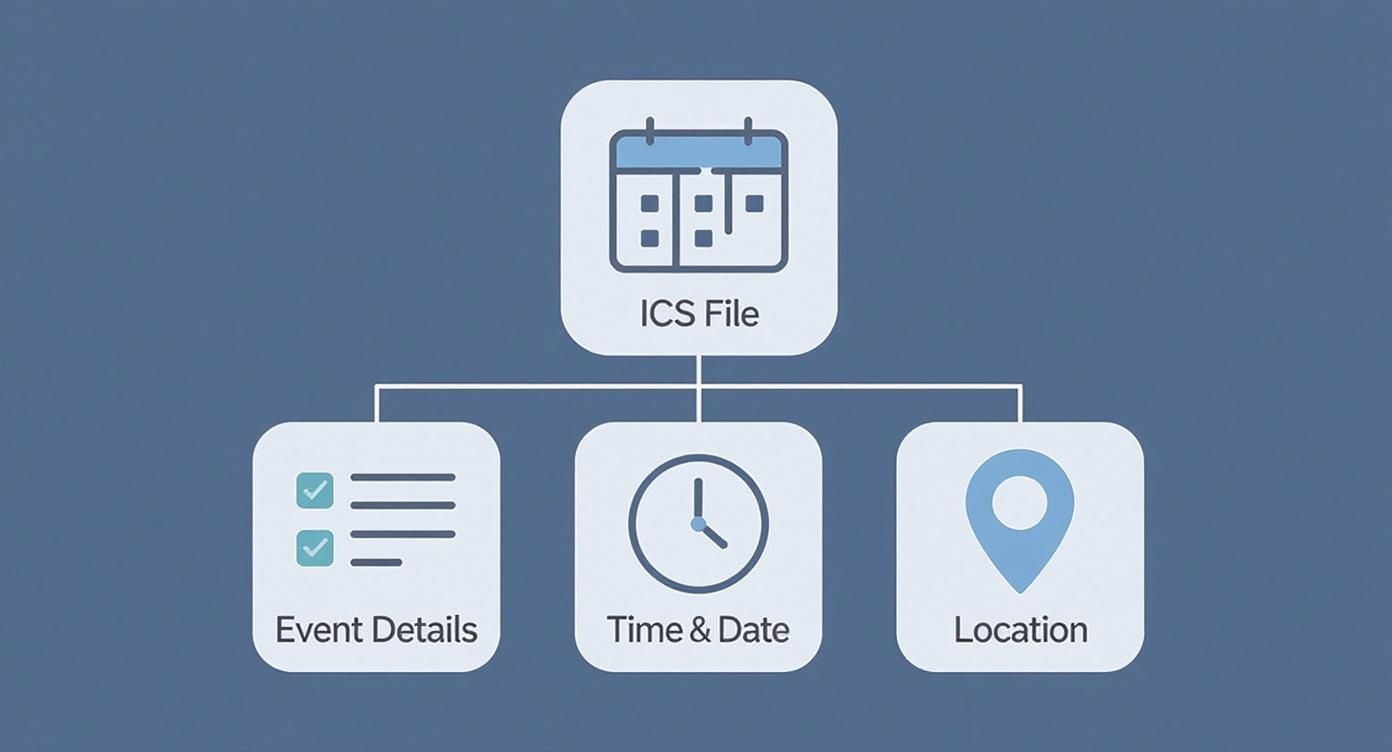
As you can see, the structure is totally logical. It groups related details - like what the event is, when it's happening, and where it is - into a clear, organized layout.
The Basic Building Blocks of an Event
Every ICS file sticks to a standard format, laid out by the iCalendar specification. It always starts with BEGIN:VCALENDAR and wraps up with END:VCALENDAR. Everything sandwiched in between describes one or more events.
Each piece of information is tagged with a property, like SUMMARY for the event's name or LOCATION for where you need to be. Let's walk through the most important ones you'll see.
- SUMMARY: This is just the title of your event. For example,
SUMMARY:Quarterly Team Sync. - DTSTART: This property locks in the exact start date and time. It almost always includes timezone info to keep everyone on the same page.
- DTEND: You guessed it - this marks the end date and time for the event.
- LOCATION: This field holds the physical address or, more often these days, a link to a virtual meeting.
- DESCRIPTION: This is where you can add all the extra context, like an agenda, notes, or links to important documents.
Getting a handle on these key fields pulls back the curtain and shows you exactly how an ics file for google calendar works so well.
A Practical Example of an ICS File
Okay, let's look at a simplified example of the raw text for a "Project Kickoff" meeting. Don't worry about memorizing the format; the point here is just to see how those properties we just talked about come together to create a full event.
BEGIN:VCALENDAR VERSION:2.0 BEGIN:VEVENT UID:event123@example.com DTSTAMP:20241105T180000Z DTSTART:20241112T140000Z DTEND:20241112T150000Z SUMMARY:Project Kickoff Meeting LOCATION:Conference Room B DESCRIPTION:Agenda - Introductions, Project Goals, and Q&A. END:VEVENT END:VCALENDAR
In this snippet, the calendar app just reads each line and puts the info in the right spot. SUMMARY:Project Kickoff Meeting becomes the event title, LOCATION tells it where to go, and so on. It's a clean, logical system that just works.
The real magic of the ICS format is its reliability. Because it's a standardized text file, it works the same way everywhere. This ensures the event details you send are exactly what the other person sees, preventing those dreaded scheduling mix-ups.
While you'll probably never need to edit an ICS file by hand, knowing what’s going on inside gives you a bit of confidence. You understand it's not some mysterious black box but a well-organized text file built for one job: making event sharing easy and universal. This basic knowledge is super helpful if you ever run into trouble and need to figure out why an event isn't showing up correctly in Google Calendar.
So, you've got an ICS file sitting on your computer - maybe from a webinar registration or a flight confirmation. Now what? Getting that event into your Google Calendar is probably the most common reason you'll ever cross paths with this file type, and thankfully, it's a piece of cake.
Think of it like this: the ICS file is a digital ticket for an event, and you just need to hand it to Google Calendar to get it on your schedule.
Given how many people live by their Google Calendar, this is a handy skill to have. Recent numbers show the platform pulled in an average of 1.215 billion monthly visits between January and March 2024 alone. It’s pretty central to how we manage our time these days, so knowing how to handle an ics file for google calendar is a must.
There are two main ways to do this on a desktop, and each is built for a different kind of situation. One method is for single, one-off events, while the other is for subscribing to a calendar that gets updated regularly.
Let's walk through it.
This is your standard Google Calendar view. The magic happens over on the left-hand side.
That left sidebar is where you'll find the controls for adding new calendars or importing files.
Method 1: Importing a Single Event File
This is your go-to method for adding a one-time event to your calendar. Think of a wedding invitation, a dentist appointment confirmation, or a concert ticket.
Once you import it, the event is on your calendar for good. The only catch is that it's a snapshot in time - if the organizer changes the details later, this event won't automatically update.
Here’s how you do it, step-by-step:
- Open Google Calendar: Head over to calendar.google.com in your browser.
- Go to Settings: Click the gear icon in the top-right corner and select Settings from the menu.
- Find Import & Export: On the settings page, look for the Import & export option in the left-hand menu.
- Select Your ICS File: Click the button that says Select file from your computer. Find the .ics file you saved and open it.
- Pick a Calendar: Use the dropdown menu to decide which calendar the event should go on (e.g., your personal, work, or shared family calendar).
- Click Import: Hit the Import button. You'll see a small confirmation pop up at the bottom telling you the event was added.
That's it! The event is now officially on your calendar, just as if you'd typed it in yourself.
Method 2: Subscribing to a Calendar URL
Sometimes, you won't get a downloadable file. Instead, you'll be given a URL that points to a calendar that's constantly being updated. This is perfect for things like a team's project timeline, a public holiday schedule, or your favorite team's game calendar.
By subscribing, you're creating a live link. Your Google Calendar will automatically check for and pull in any new events or changes.
Key Takeaway: Importing is for a single, static event. Subscribing is for a dynamic, ongoing calendar that you want to keep updated automatically.
Here’s how to subscribe using a URL:
- Open Google Calendar: Again, start at your main calendar view.
- Find "Other calendars": Look at the left-hand sidebar for the Other calendars section and click the plus (+) icon next to it.
- Choose "From URL": A small menu will pop up. Select the From URL option.
- Paste the URL: Paste the calendar URL (it usually ends in .ics) into the provided field.
- Add Calendar: Click the Add calendar button. Google will fetch the data, and you'll see the new calendar appear in your list under "Other calendars."
Now, this calendar will sync on its own, keeping you in the loop without you having to lift a finger.
If you want to explore these methods in more detail, check out our full guide on how to import a calendar into Google Calendar. Mastering both techniques gives you total control over how you bring outside events into your own schedule.
So, you’ve got the hang of importing events. That’s only half the game.
The real magic of the ICS format kicks in when you start creating and sharing your own files. When you learn how to send ICS files straight from your Google Calendar, you shift from just receiving events to actually organizing them. It puts you in the driver's seat of your own schedule.
This is a game-changer for making sure everyone’s on the same page, no matter what calendar app they swear by. Sending a meeting invite to a colleague on Outlook? Sharing a family reunion with someone using Apple Calendar? Exporting an ics file for google calendar is the universal handshake that makes it all work. It just bridges the gap between different platforms, making scheduling painless.
Google Calendar gives you two main ways to do this, each with its own purpose. You can either share a single event or export an entire calendar.
Sharing a Single Event From Google Calendar
This is your go-to method for one-off situations. Think of it as taking a quick snapshot of a single meeting or appointment and sending it over. The person on the other end can add it to their calendar in just a couple of clicks. Simple.
Best of all, it only takes a few seconds.
- Open Google Calendar and click on the event you want to send.
- A small window will pop up. Click the three-dot menu icon (More options).
- From the dropdown, select "Publish event".
- Another box will appear. Just click the "Copy" button next to the "Link to event" field.
This gives you a public URL for your event. Now, it's not a direct .ics download link, but it's clever. Anyone with that link can see the event details and add it to their calendar, and Google takes care of all the technical conversion stuff in the background. If you absolutely need a direct .ics file, some third-party browser extensions can do the trick.
Exporting an Entire Calendar as an ICS File
Sometimes, one event just isn't enough. Exporting an entire calendar is incredibly handy for bigger tasks, like making a personal backup of your schedule, moving all your events to a new calendar app, or sharing a whole project timeline with a new teammate. This process wraps up every single event from a specific calendar into one neat .ics file.
Pro Tip: I make it a habit to regularly export my most important calendars. It’s a smart backup plan. If my account ever gets locked or something goes wrong, I have a complete record of my schedule that I can easily import somewhere else.
Here’s the step-by-step for exporting a full calendar:
- Hop on your computer and open up Google Calendar. You can’t do this from the mobile app, by the way.
- Look for the "My calendars" section on the left-hand sidebar.
- Hover your mouse over the calendar you want to export, click the three-dot menu icon that appears, and choose "Settings and sharing."
- On the settings page, click the big "Export calendar" button near the top.
A ZIP file will immediately start downloading. Unzip it, and you'll find the .ics file inside, packed with all your events. It's now ready to be imported into another Google Calendar account or any other calendar service you can think of. Once you’ve mastered both single-event sharing and full-calendar exports, you’ve got total control over how you manage and share your time.
Automating Event Sharing for Business Growth
For businesses, marketers, and creators, manually exporting and sharing ICS files just doesn't scale. Sure, it works fine for a one-off meeting, but what happens when you’re running a webinar for thousands of attendees? And what if you suddenly need to change the start time or update the meeting link?
Sending out a new .ics file to every single person is a logistical nightmare. You end up creating confusion, cluttering inboxes, and massively increasing the odds that attendees will show up at the wrong time or with the wrong link. It's a purely reactive and inefficient way to manage events, with zero tracking or control.
The Limitations of Manual ICS Files
When you rely on static, manually created ICS files for any event at scale, you'll quickly hit a wall. These limitations don't just create headaches for you; they create a poor experience for your attendees.
- No Centralized Updates: A static ICS file is a snapshot in time. The second you update the event in your own calendar, every file you've already sent out becomes obsolete. There’s simply no way to push those updates to your attendees' calendars automatically.
- Lack of Analytics: You’re flying blind. Did 10 people add your event, or 1,000? This lack of data makes it impossible to gauge interest, send targeted reminders, or measure how well your promotional efforts are actually working.
- High Potential for Error: Every manual export and email attachment is another chance for human error. Sending the wrong file or forgetting to include a critical update can lead to frustrated attendees and seriously damage your brand’s reputation.
These challenges scream for a more dynamic and automated solution, especially in a professional setting where reliability and efficiency are everything.
A Smarter Way to Share Events
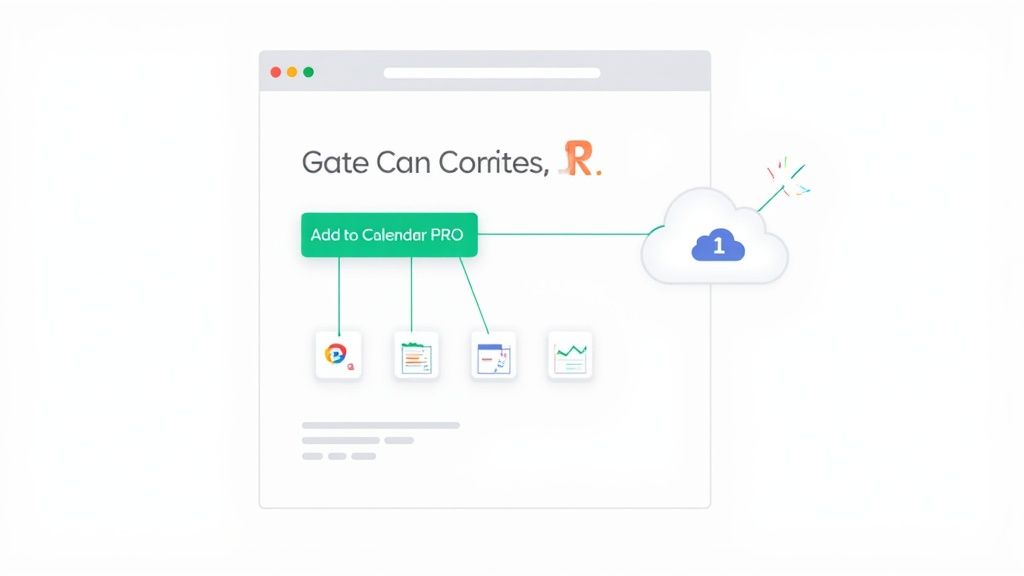
This is the exact problem our service, Add to Calendar PRO, was built to solve. Instead of wrestling with individual files, our service automates the whole process by generating smart, dynamic 'Add to Calendar' buttons you can embed directly on your website, landing pages, or in your emails.
When an attendee clicks one of these buttons, our system generates a perfectly formatted event file on the fly, tailored for their specific calendar app - whether that's Google Calendar, Outlook, or Apple Calendar.
Even better, these events aren't static. If you need to change event details, you just update them once in our dashboard. Everyone who added the event will see the changes reflected automatically in their own calendars. It completely removes the friction and uncertainty for both you and your audience.
An automated 'Add to Calendar' solution transforms event sharing from a manual, error-prone task into a powerful marketing and communication tool. It ensures accuracy, provides valuable insights, and delivers a seamless experience for every attendee.
Gaining Control with Automation and Analytics
The benefits of moving beyond manual file sharing go way beyond simple convenience. For event organizers and marketers, an automated system unlocks a whole new level of control and insight. This is especially crucial in today's digital scheduling space. The calendar app market was valued at USD 5.71 billion in 2023 and is projected to hit USD 16.37 billion by 2030 - a clear signal of just how central these tools are to our lives.
With our service, you get access to features that static files could never offer:
- Event Analytics: See exactly how many people have added your event to their calendar, giving you a real-time pulse on engagement.
- RSVP and Registration: Collect attendee information directly through the 'Add to Calendar' button, simplifying your registration workflow.
- Automated Reminders: Schedule reminders to be sent to attendees, reducing no-shows and keeping your event top-of-mind.
For developers looking to integrate this functionality deeply into their own applications, our platform also offers a robust events API. You can dive into how to programmatically create and manage events with an API in our detailed guide. This level of automation ensures your event management is efficient, scalable, and fully integrated, letting you focus on creating a great event instead of getting bogged down in logistics.
Common Questions About ICS Files
Once you start using the ICS format regularly, you're bound to run into a few specific questions or quirky situations. The format itself is rock-solid, but knowing the finer points can save you a ton of headaches down the road. We’ve pulled together some of the most common questions people ask when using an ics file for google calendar to give you quick, no-nonsense answers.
Think of this as your go-to guide for those "what if" moments. From editing events to fixing weird timezone glitches, these answers will help you manage your calendar like a pro.
Can I Edit an Event After Importing an ICS File?
Yep, absolutely. As soon as an ICS event lands in your Google Calendar, it acts just like any other event you created yourself. You have full control to tweak the title, shift the time, update the location, or add notes to the description.
But here’s the key thing to remember: any changes you make are local to your calendar only. The original ICS file is completely untouched, and nobody else who imported that same file will see your edits. If you need to share your updates with others, you'll have to export the modified event and send out a new ICS file.
What’s the Difference Between Importing and Subscribing?
This is a big one, and it trips people up all the time. While both get events onto your calendar, they do very different jobs.
- Importing an ICS file is a one-and-done action. It's like taking a snapshot of an event and pasting it into your schedule. If the original event details change later, your calendar is completely in the dark - the imported event will not update. This is perfect for fixed, one-off events like a doctor's appointment or a single webinar.
- Subscribing to a calendar URL creates a live, dynamic link. Your Google Calendar will regularly check the source for any changes - new events, cancellations, or time adjustments - and automatically sync them. This is the way to go for schedules that evolve, like a team project calendar, a sports team's game schedule, or a list of public holidays.
In short: import for a single, fixed event. Subscribe for a continuous, updating calendar. Getting this right is the secret to keeping your schedule accurate with zero extra effort.
Why Did My Imported Event Show Up at the Wrong Time?
This is almost always a timezone mix-up, and it's one of the most common frustrations with calendar files. Every ICS file has specific timezone information baked into its data. If that timezone doesn't line up with the default setting in your Google Calendar, the event can get shifted forward or backward by several hours.
To fix it, first hop into your Google Calendar settings and make sure your primary timezone is set correctly. The issue can also start with the person who created the file; they need to embed the correct timezone when they export the event. Explicitly setting the timezone from the start is the best practice that prevents this headache entirely.
Do ICS Files Work on Mobile Devices?
They sure do, and this seamless cross-device compatibility is one of the biggest strengths of the ICS format. It's designed to just work. When you add an event from an ics file for google calendar on your computer, it syncs automatically across every device where you’re logged into your Google account, including your phone and tablet.
Even better, you can open ICS files directly on your mobile device. If you get an .ics file in an email on your phone, just tap on it. Your phone's OS knows exactly what to do and will instantly prompt you to add the event to your default calendar app. It makes managing your schedule on the go incredibly easy.
At Add to Calendar PRO, we believe managing and sharing events should be simple, accurate, and powerful. If you're ready to ditch manual file sharing and unlock automated, trackable, and professional event marketing, we're here to help. Discover how Add to Calendar PRO can streamline your event workflow today.